Why Ductless Mini Split Installation is the Smart Choice for Central Florida Homes
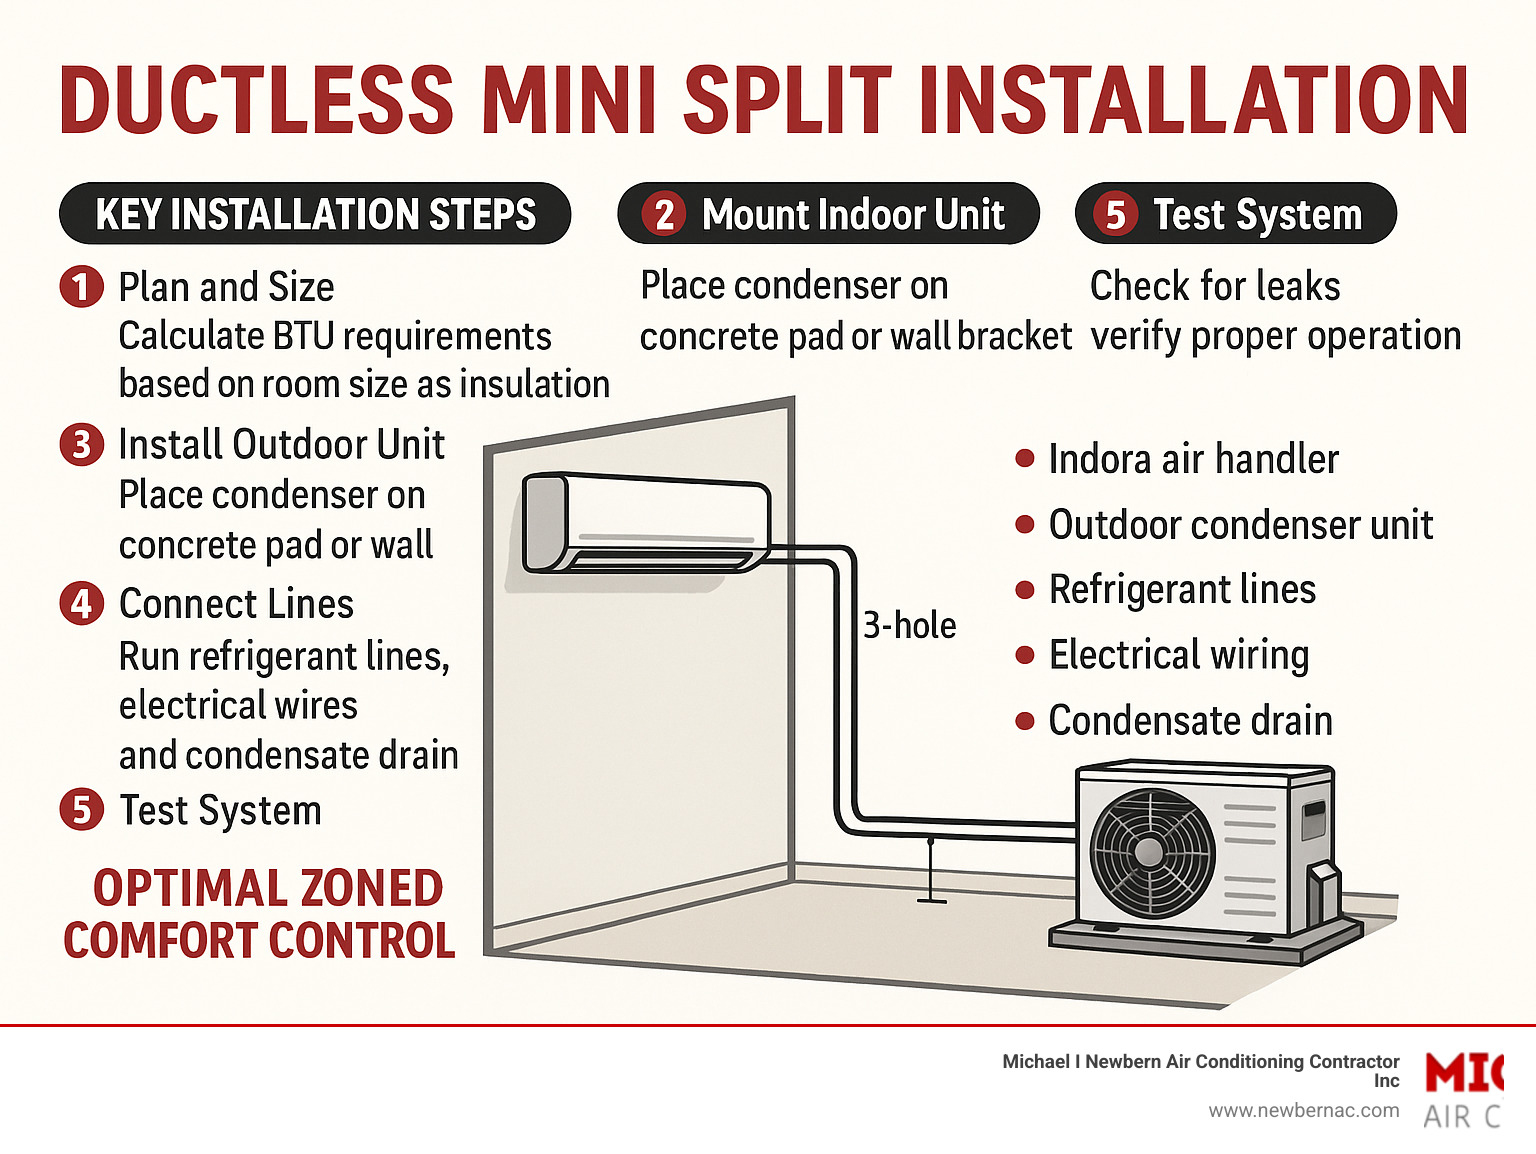
Ductless mini split installation offers Central Florida homeowners an efficient way to cool and heat specific areas without the need for extensive ductwork. Here’s what you need to know about the installation process:
Key Installation Steps:
- Plan and Size – Calculate BTU requirements based on room size and insulation
- Mount Indoor Unit – Install wall bracket and drill 3-inch hole for line set
- Install Outdoor Unit – Place condenser on concrete pad or wall bracket
- Connect Lines – Run refrigerant lines, electrical wires, and condensate drain
- Test System – Check for leaks and verify proper operation
Essential Components:
- Outdoor condenser unit (compressor and heat exchanger)
- Indoor air handler (evaporator and fan)
- Refrigerant lines (connect indoor and outdoor units)
- Electrical wiring (power and communication cables)
- Condensate drain (removes moisture)
These systems are perfect for older Central Florida homes without existing ductwork, room additions, or areas where traditional HVAC systems struggle to maintain comfort. Unlike central air systems that can lose more than 30% of energy through ductwork, mini splits deliver conditioned air directly to each zone.
Modern ductless systems achieve SEER2 ratings between 15.2 and 35, compared to ducted heat pumps that typically range from 15.2 to 25 SEER2. This means better efficiency and lower energy bills for your home.
While DIY installation is possible with some systems, professional installation ensures proper refrigerant handling, electrical connections, and warranty protection. A single ductless heat pump can replace up to eight baseboard heaters when comparing energy efficiency.
Introduction to Ductless Mini-Splits
Picture this: you walk into your favorite room, and it’s exactly the temperature you want it to be. Not too hot, not too cold – just perfect. That’s the magic of ductless mini split installation, and it’s changing how Central Florida homeowners think about comfort.
What exactly is a mini-split? Think of it as your home’s personal climate control system that doesn’t need those bulky ducts running through your walls and attic. Instead of forcing air through a maze of metal tunnels (where you can lose more than 30% of your energy), mini-splits deliver comfort directly where you need it most.
The beauty lies in their simplicity. Every mini-split system has three main components that work together like a well-choreographed dance. The outdoor condenser sits outside your home, housing the compressor that does the heavy lifting. The indoor air handler – that sleek unit you’ll see mounted on your wall – contains the fan and evaporator that actually condition your space. Connecting these two is the conduit line, a slim bundle that runs through just a small hole in your wall, carrying refrigerant lines, electrical wiring, and a drain line.
How do they work their magic? It’s actually pretty clever. The system moves heat around using refrigerant – kind of like how your refrigerator works, but in reverse when you need heating. During summer, the indoor unit absorbs heat from your room and sends it outside through the refrigerant lines. Come winter, the process flips, pulling heat from the outside air (yes, even when it’s chilly) and bringing it indoors.
Here in Central Florida, mini-splits are ideal for older homes that were built before central air became standard. No need to tear up walls or cram ducts into spaces that weren’t designed for them. They’re also perfect for room additions – that new sunroom or converted garage can have its own climate control without major renovations to your existing system.
The energy efficiency is where mini-splits really shine. While traditional ducted systems typically achieve SEER2 ratings between 15.2 and 25, ductless systems can reach an impressive 15.2 to 35 SEER2. That’s like comparing a regular car to a hybrid – the difference shows up on your electric bill every month.
The best part? You get zoned comfort that lets you cool or heat only the rooms you’re using. No more paying to condition empty bedrooms or arguing over the thermostat. Each indoor unit can be controlled independently, so everyone gets their perfect temperature.
For homeowners in Auburndale, Haines City, and Davenport, certified energy-efficient models offer even greater savings and environmental benefits. It’s comfort that makes sense for both your wallet and your home.
Planning Your Installation: Sizing, Placement, and Tools
Proper planning is the foundation of a successful ductless mini split installation. Getting the details right at this stage ensures your system operates efficiently and provides maximum comfort.
Sizing and Placement are Critical
- Sizing: A mini-split must be sized correctly for the space using BTU calculations. This considers not just square footage, but also insulation quality, window placement, and sun exposure. An undersized unit will struggle to cool the space, while an oversized unit will “short-cycle,” failing to properly dehumidify the air.
- Placement: The indoor unit should be mounted high on a wall (at least six feet up), away from direct sunlight or heat sources, with ample clearance for airflow. The outdoor unit needs a level, stable surface like a concrete pad, with good ventilation. Keeping the distance between the two units as short as possible improves efficiency.
System Type and Efficiency
- Single-Zone vs. Multi-Zone: A single-zone system connects one indoor unit to one outdoor unit, perfect for a single room. A multi-zone system allows one outdoor unit to power several indoor units, providing independent temperature control for different areas.
- SEER2 Ratings: This rating measures energy efficiency. Higher numbers mean lower energy bills. Ductless systems boast impressive SEER2 ratings from 15.2 to 35, often outperforming traditional ducted systems. You can find certified energy-efficient models to maximize savings.
Key Technical Requirements
- Electrical: Most mini-splits require a dedicated 220-volt circuit and a disconnect switch near the outdoor unit for safety. This requires professional electrical work to avoid overloading your home’s system.
- Condensate Drain: The system removes humidity, which must be drained. The condensate line must have a continuous downward slope for gravity to work. If this isn’t possible, a condensate pump is required to prevent water damage.
- Tools: A proper installation requires a stud finder, level, drill with a hole saw, and specialized HVAC tools like a torque wrench, flaring tool, manifold gauges, and a vacuum pump.
For a deeper dive into these crucial factors, you can find More info about Mini Split Sizing and Placement.
The Step-by-Step Ductless Mini Split Installation Process
Here’s a look at the key steps involved in a ductless mini split installation. This guide is for informational purposes; we strongly recommend professional installation for safety, performance, and to protect your warranty. Handling refrigerants and high-voltage electrical work requires certified expertise, and many manufacturers will only honor warranties on professionally installed systems.
Installing the Indoor Unit (Air Handler)
The indoor unit is the part of the system you’ll see and interact with daily. Proper placement is key for both aesthetics and function.
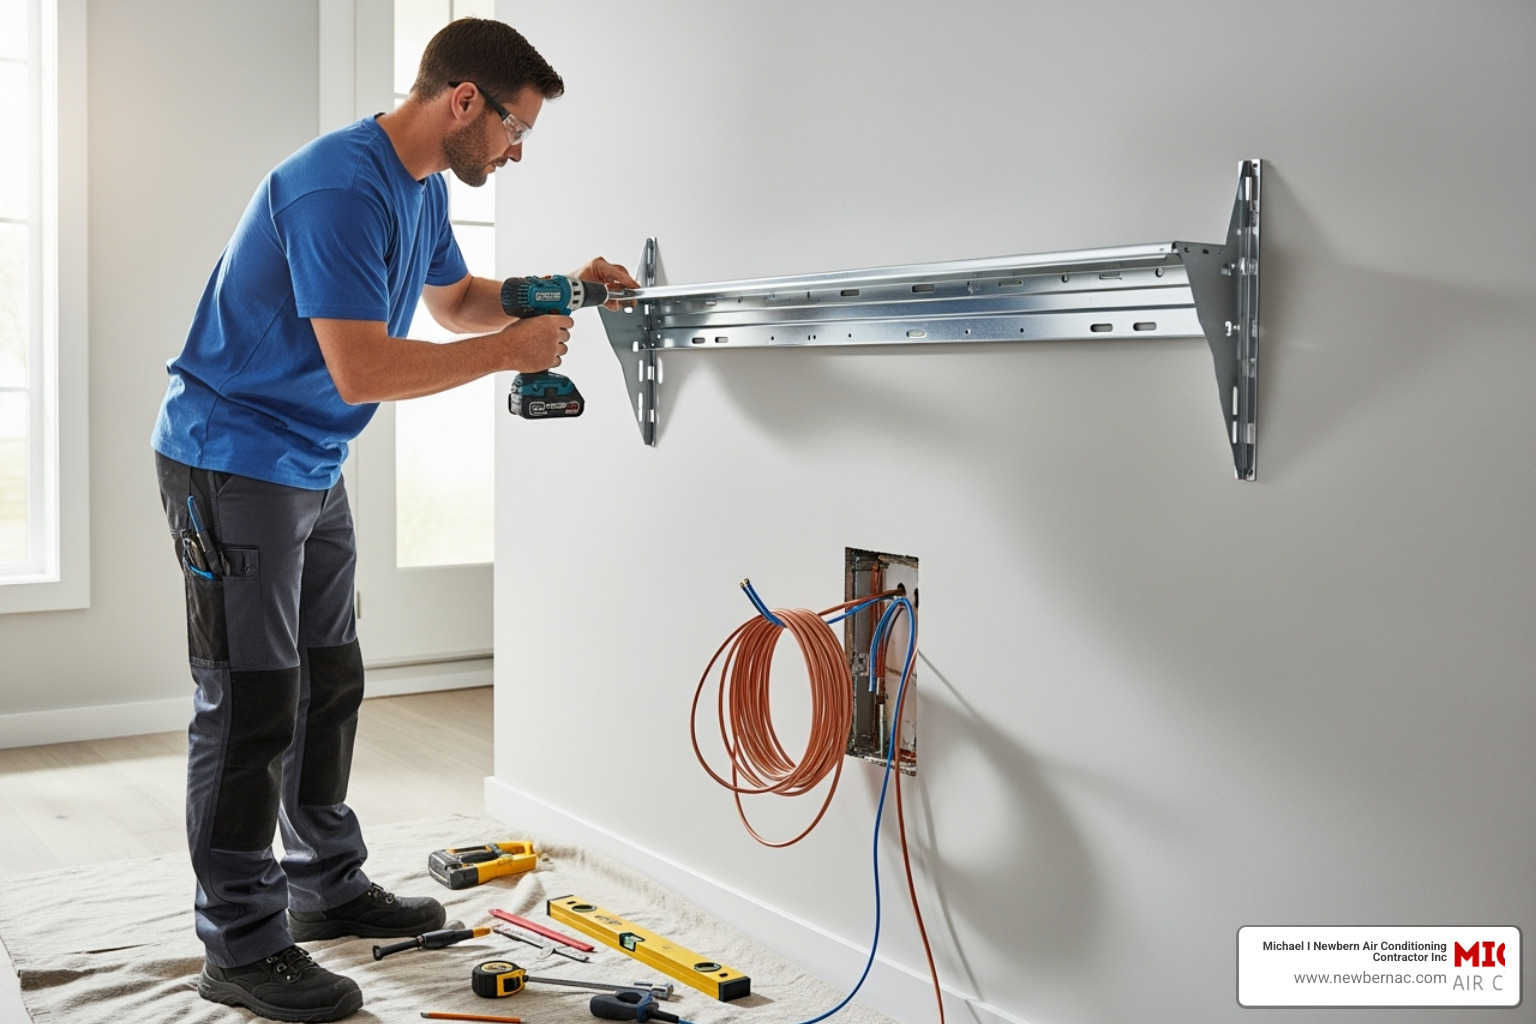
- Location and Mounting: We select an ideal spot on an exterior wall, typically at least six feet off the floor for optimal airflow. Using a stud finder, we securely anchor the mounting bracket to the wall studs, ensuring it is perfectly level to prevent future drainage issues.
- Drilling the Conduit Hole: A 3-inch hole is drilled through the wall to the outside. We angle it slightly downward to allow gravity to drain condensation away from your home.
- Running the Lines: The refrigerant lines, electrical wiring, and condensate drain are carefully bundled together and fed through the hole before the indoor unit is mounted securely on its bracket.
Installing the Outdoor Unit (Condenser)
The outdoor condenser is the powerhouse of your mini-split system. It needs a stable, secure location to operate efficiently.
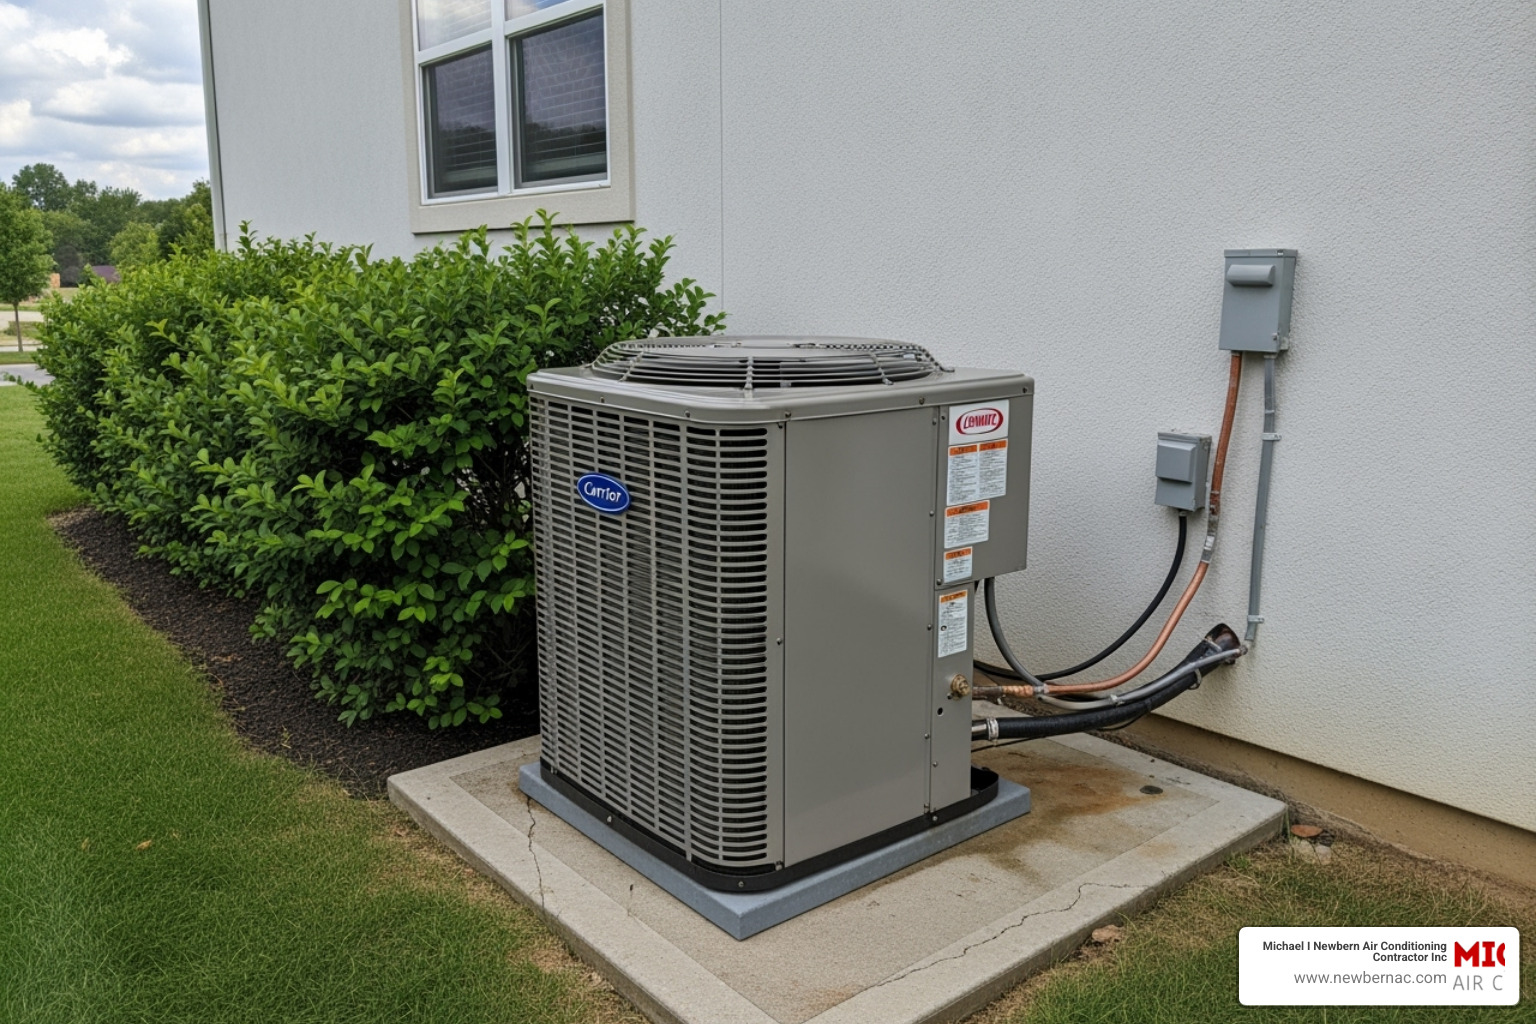
- Preparing the Location: The unit must be placed on a level, stable surface, like a concrete pad or a sturdy wall bracket. We choose a spot with good airflow, away from windows and debris, preferably on the cooler north or east side of the home to boost efficiency.
- Connecting the Lines: This is a critical, technical step. We use a special tool to flare the copper refrigerant lines to create a perfect, leak-proof seal. A torque wrench is used to tighten the connections to precise manufacturer specifications.
- Electrical and Final Steps: The electrical wiring is connected according to all local codes, including a required disconnect switch. Finally, a vacuum pump is used to remove all air and moisture from the lines before the refrigerant is released. This step requires EPA certification and is crucial for the system’s longevity and performance.
For more detailed information about how these systems benefit your home, check out our More info about our Ductless Mini Split Systems.
DIY vs. Professional Installation: What You Need to Know
The idea of a DIY ductless mini split installation is tempting. The potential cost savings and satisfaction are appealing, and some manufacturers even market “DIY-friendly” kits. However, the risks associated with a DIY installation are substantial and can quickly outweigh the benefits.
Warranty, Safety, and Technical Risks:
- Voided Warranties: The most significant risk is voiding your manufacturer’s warranty. Most companies require installation by a licensed HVAC professional to honor their warranty.
- Refrigerant Handling: Handling refrigerant requires EPA certification. Improperly flared connections—a common DIY error—can cause slow, damaging leaks. Accidentally venting refrigerant can lead to hefty EPA fines and can cause severe skin burns.
- Electrical Hazards: Mini-splits often need a dedicated high-voltage circuit. Incorrect wiring is a serious fire and shock hazard.
- Specialized Tools: A proper installation requires tools most homeowners don’t own, such as a vacuum pump, a micron gauge, and a torque wrench. Using inadequate tools leads to poor performance and system damage.
The Professional Advantage:
Hiring a professional installer mitigates these risks. Our top priority is safety, ensuring all work complies with local codes. Our experience means we can accurately size your system and determine the best placement for efficiency. A professional installation protects your warranty, ensures permit compliance, and leads to better long-term performance. We can also help you Explore potential rebates and savings to offset installation costs.
Common Mistakes in Ductless Mini Split Installation to Avoid
Several common errors can compromise your system. We’re often called to fix issues stemming from:
- Improper Sizing: A unit that’s too large will “short-cycle,” failing to dehumidify the air properly. A unit that’s too small will run constantly, increasing energy bills.
- Incorrect Placement: Placing an indoor unit in direct sunlight can confuse its thermostat. An outdoor unit with poor airflow can’t dissipate heat effectively, straining the system.
- Poor Connections & Vacuum: Badly flared copper tubing is the top cause of refrigerant leaks. Failing to pull a proper vacuum before charging the system leaves moisture and air in the lines, which can destroy the compressor.
- Ignoring Permits: Most Florida jurisdictions require permits. Skipping this step can lead to fines and issues when selling your home.
If you’re experiencing issues like poor airflow, the cause often traces back to one of these installation mistakes. Our team can help troubleshoot Mini Split Airflow Problems Solutions and get your system running correctly.
Frequently Asked Questions about Mini-Split Installation
Homeowners across Central Florida, from Auburndale to Davenport, often have the same questions about ductless mini split installation. Here are answers to the most common ones.
What is the average cost to install a ductless mini-split?
The cost of a ductless mini split installation varies based on several factors. The final price depends on the system’s size (BTUs), the number of indoor units (zones), and the complexity of the installation. Generally, costs can range from $2,000 for a simple single-zone system to over $10,500 for a complex multi-zone setup. Because every home is unique, we recommend you Request Estimate for a precise quote based on your specific needs.
Do I need a permit to install a mini-split in Florida?
Yes, in almost all cases. Most jurisdictions in Central Florida require an electrical permit at a minimum, as mini-splits need a dedicated circuit. Some areas may also require a mechanical permit. It’s crucial to check with your local building department. A professional installer handles all the necessary permitting to ensure your installation is safe, legal, and compliant with local codes, which is important for insurance and home resale.
How long does a ductless mini-split last?
A well-maintained ductless mini-split system can last 15-20 years. The two most important factors for longevity are proper professional installation and regular annual maintenance. A correct installation prevents premature wear and tear, while annual check-ups keep the system running at peak efficiency and allow technicians to catch small issues before they become major problems. To get the most out of your investment, Learn How to Maintain Your Ductless Mini Split System.
Trust the Experts for a Flawless Installation
After walking through all the details of ductless mini split installation together, from those sleek indoor units to the powerful outdoor condensers, one thing becomes crystal clear: these systems are truly game-changers for Central Florida homes. The zoned comfort they provide means no more arguing over the thermostat, and the energy savings can be remarkable – especially when you consider those impressive SEER2 ratings of up to 35 compared to traditional ducted systems.
But here’s the thing about installation complexity – it’s more involved than it might first appear. The idea of tackling a DIY project can be appealing, especially when you’re thinking about potential savings. However, when you’re dealing with refrigerant lines that need perfect flares, electrical connections that must meet code, and vacuum pumps that need to pull below 500 microns, the stakes get pretty high pretty quickly.
While a DIY approach is tempting, a professional installation ensures your system runs safely, efficiently, and is protected by warranty for years to come. We’ve seen too many well-meaning homeowners end up with refrigerant leaks, voided warranties, or systems that just don’t perform the way they should. And let’s be honest – nobody wants to deal with EPA fines or electrical hazards in their own home.
For over 30 years, Michael I Newbern Air Conditioning Contractor, Inc. has been the trusted choice for thousands of homeowners in Auburndale and across Central Florida. We’ve installed countless ductless systems in homes just like yours, from historic properties in downtown Auburndale that needed modern comfort without major renovations, to new additions in Haines City where traditional ductwork just wasn’t practical.
Our team brings not just the right tools – those specialized torque wrenches, vacuum pumps, and micron gauges – but also the experience to spot potential issues before they become problems. We handle all the permits, ensure your electrical connections meet local codes, and make sure your system is sized and placed for optimal performance from day one.
Ready to experience the comfort and efficiency that only comes with a professionally installed ductless mini-split system? Contact us today for expert heating installation in Auburndale, FL and let’s bring that perfect climate control to your Central Florida home.


